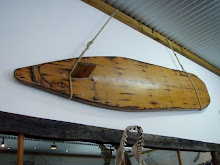
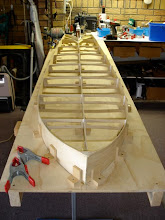
 Ian has just finished is 9ft longboard.All the components have been laser cut from hardwood ply with cork rails and deck inlay.

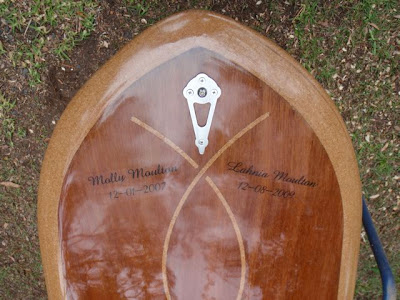
 Ian has used some interesting details on this board.
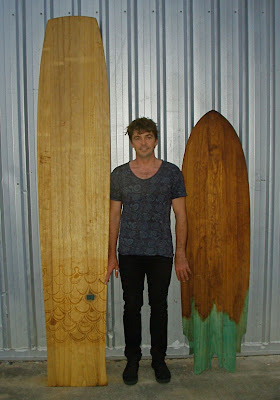 Last night down at Byron Bay a number of young designers and surfboard builders gathered to show their wares at Stone and Wood brewery. Great location to meet anytime when you can stand surrounded by vats of beer and surfboards , photographs of surf and groovy clothes.Oh and $2 beers.I met Simon from Lennox Head there and he builds boards in a shed out in the country. Nice resin work on his boards. But these two alaias stood out as being quite different.
 " Hi Grant, Here are a few pics of a 10'8" SUP I just laminated. The deck and bottom are made of recycled cedar fence boards from one of my landscape client's old fence. I was building them a new one of corrugated steel and bamboo, and while working on that, kept eyeballing the old boards. The owner asked us to take them away, so off they went to await their metamorphosis. Combined with Paulownia (rails, nose and tail blocks) and a bit of mahogany and redwood, it looks sweet. "


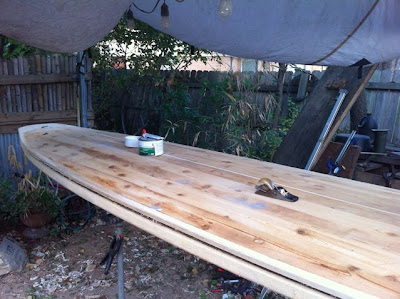
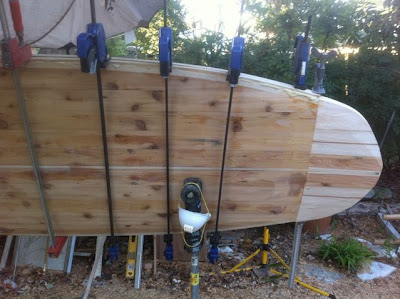

 Troy seems to always be building another SUP , in fact he builds more than anyone I know of. So if you need some pointers contact him : lefthandman@mac.com
 " My name is Boris Stender, I am from Germany. first I want to say I love your blog ´wooden surfboards`. I did not knew that there are so many boardbuilders.... I learned a lot about boardbuilding.

 " The logo and the words are not burned, its printed on a normal inkjet printer on a paper for transforming on t-shirts. you print it out and than you had to iron it on the board."
 "The first Alaia is 7´2´´ x 15 1/2´´ x 3/4´´ because I found this dimensiones in the web. the second I made a bit wider 7´2´´ x 16 1/4´´ x 3/4´´ and the third is 6´6´´ x 161/2´´ x 3/4´´...."
 " I was inspired by Tom Wegener but I added a channeled bottom because I thought that is the minimum if there are no fins. the result was great when we tried the boards in April...."


 " Here they are riden by friends of mine Manuel Cabezudo and Asier Agirre. fotos of Manolo are from April, Asier from November. they told me they liked the session a lot......"

 As you can see there are people from all walks of life from all sorts of places , even land locked countries building wooden boards. It is great to have them share their experiences , so thanks Boris and we look forward to your next projects.


 Yes here is your opportunity to have your very own supply of Paulownia at your back door.Here is the email I was sent :
 David did the Paul Jensen course last month and this is the board he built. It is now ready to be tested in the waves this summer.Here is Davids email to me.


#8 an alaia spanish day from hidden wood on Vimeo.
These French guys from Anglet are building some great looking Alaias.Check them out at : Roger Hall from Surfline Surfboards in New Zealand loves wood and loves a challenge.
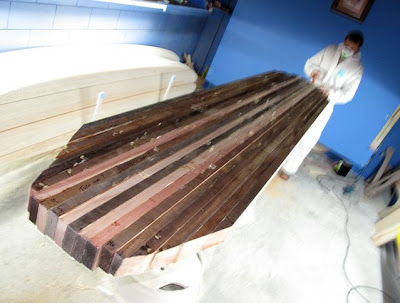 He spent a whole day at a timber yard selecting the right sticks for this project , matching colour and weight for this solid wall hanger board.
 Cleaning it up with the hand plane to get it ready to setup on the APS3000 shaping machine.
 A sharp cutting head , plenty of time and you can save a weeks worth of work using the right gear.Roger has hand shaped many wooden boards and done the hard yards , hand sanding and finishing . So this is just the smart way to get the job done without wrecking yourself and saving an enormous amount of time when you are a small operator.
 Plenty of cuts and the finish is pretty well smooth as a babies bum. Saves days of hand sanding.
 And there you have it a 1930's 10ft Hot Curl finless board ready for oiling. That will make the colour come out. Roger isn't the biggest guy , but it looks like she carries a little weight.
 " The board is a 7'2" quad fish 21" wide made from 6mm Paulownia and western red ceder accent strips and will have a 4oz glass all over. "
 This is Dave's own design , similar to the Grain kits with bead and cove rail method.
 To explain to the following ... " I'm a Car designer at Ford, we use a Software called Alias which I used to create the data for the Hollow wooden fish,


 I agree with Dave that computers and people who know the software can make the whole process so much easier and far more accurate. I to started building boards by drawing them up on butchers paper and bending long lengths of thin wood to get my curves and flow I was after. But hand lofting plans and then copying them onto wood to hand cut out is a long process. Very rewarding and a great learning experience. But like most people I would say the hardest part is creating the rail band shape if you are building a board with laminated rails. It is such a complex curve and a very important one as it ends up being very visible in the finished board.A computer can create this for you in no time at all.The other thing that becomes quite obvious is that there are so many design elements and decisions to be made as you go.We have spent countless hours sitting on boards and probably only felt the rail as we slide it in and out of the board bag. It will certainly help if you have an appreciation of what you have been riding and what you like when it comes your time to design a board.I am sure that once you have made your first board that you will have a greater appreciation for the hand shaper who has carved out your board by hand and eye.